You may be using an outdated faucet that has seen better days, and now it is leaking. Like most of us, a leaking faucet is irritating, and if your water is hard can start to leave staining on your bathtub.
The problem is most of us feel that replacing a faucet is a daunting job and needs a professional who will undoubtedly charge professional rates.
In these unprecedented times where money can be tight, there are few options for many of us, and the thought of DIY leaves the blood running cold in our veins.
But hold on a second, is replacing a two-handle bathroom faucet that difficult? Is it truly beyond your capabilities?
The truth is you can do it, and you can do it with some basic DIY tools that you may have in your toolbox right now.
If you lack the confidence to read on and follow this easy guide, you will surprise yourself and your friends and family with your newfound DIY skill.
Let’s get at it!
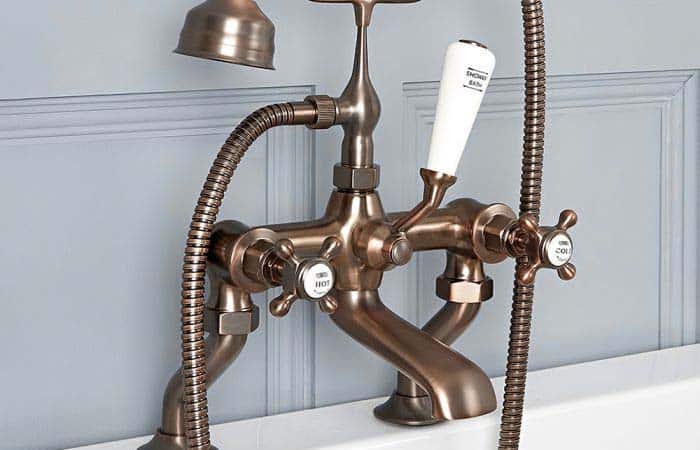
- Select Your New faucet
If you can’t find what you’re looking for from your local DIY store or plumbing store, then get online.
The online choices are extensive, and you can find a two-handle faucet that you find appealing and will enhance the appearance of your bathroom.
You will find a faucet to suit your budget but the best quality faucet you can afford. It will last longer, and the treads and seals are easier to work with.
There are dozens to choose from if you are buying online, and next-day delivery will undoubtedly be available to you.
- Tools
You will need the following tools to remove the leaking faucet and install the new faucet:-
- 4 in 1 screwdriver
- Flathead screwdriver
- Adjustable wrench
- Shower valve set
- Washer
- Stem
- Safety Precautions
Pay attention to this to avoid a disastrous situation. Shyt the mains water supply valve, you can either find the shut-off valve outside or under the kitchen sink where the mains water supply enters the property.
Open the offending facet fully and make sure there is no water coming out.
- Starting the Removal
Removing the handles is easy. Lever of the center cap on the handles underneath, you will see a screw head.
Unscrew the screw and remove it carefully. You can now remove the handle. At this point, I need to tell you not to lose the screws and any other parts you remove. Losing the screws will cause problems when it comes to the reassembly of the faucet.
It is a good idea to lay the parts in the order you have removed them, and this will make sure you can follow the reverse procedure when installing the new identical components.
Now, use the wrench and wrench the hex nut anticlockwise to remove the stem. Check if the washer is worn, this will be causing the handle leak. If you are tempted to replace the washer seal, you may find the item is damaged, and the only solution is to replace the complete faucet.
If you choose to replace the washer and the leak has stopped, your troubles are over for now, and you can just reverse the process and install the stem and handles.
- Replacing The Faucet
You can now replace the faucet, ensure the threads screw back easily. If you feel any resistance, back the threads off and try again. If you cross the threads at this point, the faucet will be ruined. Don’t panic, the threads are easy to screw back together. Just be aware of resistance when starting the threads.
You are on your way to completing your DIY faucet replacement.
Follow the same steps in reverse, and you should be good to go. O rings and washers benefit from a bit of grease, as go the threads. A little lube goes a long way, so don’t overdo it.
When you have everything back together, and it’s all looking good, close the faucet valves.
Turn the mains water pressure back on and check for leaks. With your newfound skills, you will find there are no leaks, and you have saved yourself the cost of employing a plumber to fix a job that was easy for you.
Extra Information
If you are not wholly confident and find following a guide complex, you can find many videos online to view and follow the step-by-step guide.
If you can’t identify your exact faucet type, don’t worry. They all work in the same way.
Your new faucet components may include an aerator that attaches to the water outflow of the faucet.
Don’t worry. Your new faucet also comes with installation instructions.
Final Thoughts
If you need to change a single handle faucet, the procedure is much the same.
Most plumbing jobs around the home are straightforward and only really need an expert dealing with large leaks and boiler work.
New pipework designs in plastic make it easy for the homeowner to tackle most plumbing jobs around the home.
Even transition connections from copper to plastic are leak-free when connected in line with manufacturers’ instructions.
Having the confidence to tackle jobs in the home is needed to perform even some of the most seemingly difficult tasks.
With a few tools and a will to succeed, then you can find DIY skills that you never knew you had.
Most DIY tools are relatively inexpensive and readily available.
You can take pride in the knowledge that you can make repairs equally as well as a professional.
Except for electrical connections, it is safe and always a good idea to go and achieve something for yourself.
Not to mention the savings you will generate from doing your repairs over the many years to come. Who knows, this could be your newfound part-time career generating income from family and friends.